UT3: Post Processing

Post Processing is where you will get a lot of your ambient feel for your level, it can also help brighten the light or dark colors, darken them if you'd like, or even change the overall base color all together. It can also desaturate your scene, and add distance fog. I will be touching all of these in this tutorial
Creating Post processing:

To create a post processing volume for your level, you first need a brush sized to the scale you want for your level. Scale and position the brush to the size you want, then right click on your 'add volume' node on the left side of UT3 just above the eyes, and scroll down until you see 'Post Process Volume'. When you click that, move the brush tool (or hide it) and a pink box should appear. This is simply a guide to show the size of your post processing volume.
If you are not happy with the scale of the post processing volume, you can either use the scale tool, or change the overall look of it using the 'geometry mode', however, the geometry will have to be re-built.
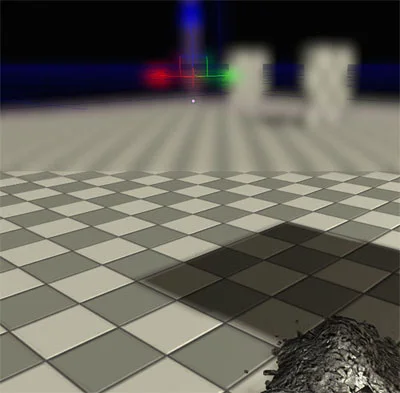
If you click on the post processing node (pink box) you will see this.
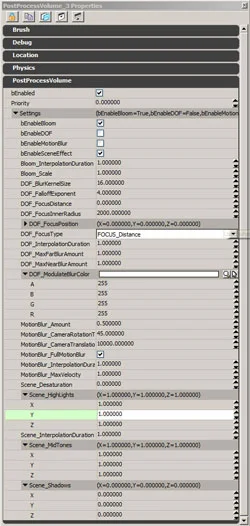
The details of this menu will be covered more clearly below. For now, I will blow over the functions that are here.
Bloom – this option makes light assets in your level glow. (Usually due to a high spec value like on clean metal or windows)
DOF – Depth of field is an option where you can create objects in the distance more blurry than objects closer to the player. This is also a handy little tool to help soften the scene a little bit.
Motion Blur – this attribute is used to blur the screen depending on certain variables such as how fast the camera rotates or translates.
Screen desaturation – desaturates the screen based on a 0 to 1 value.
The following 3 settings change the overall appearance of the scenes tones based on the highlights, mid tones and shadows of the scene.
Bloom:
When a spec or color is pushed to and past the solid white, it glows.
'Blur Scale' simply scales up the blur strength.
DOF:
This one will take a little longer to go through.
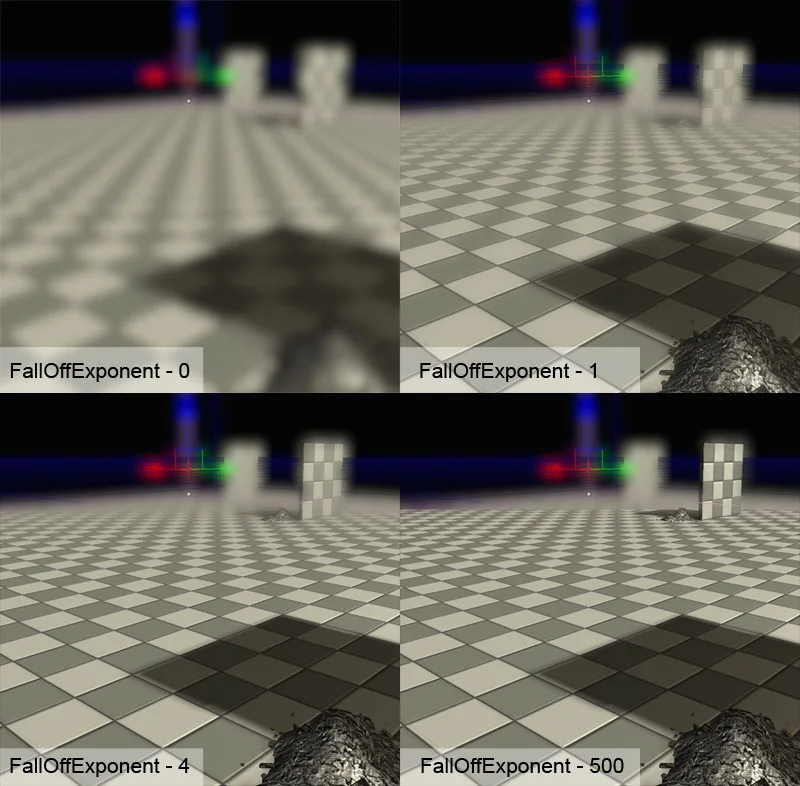
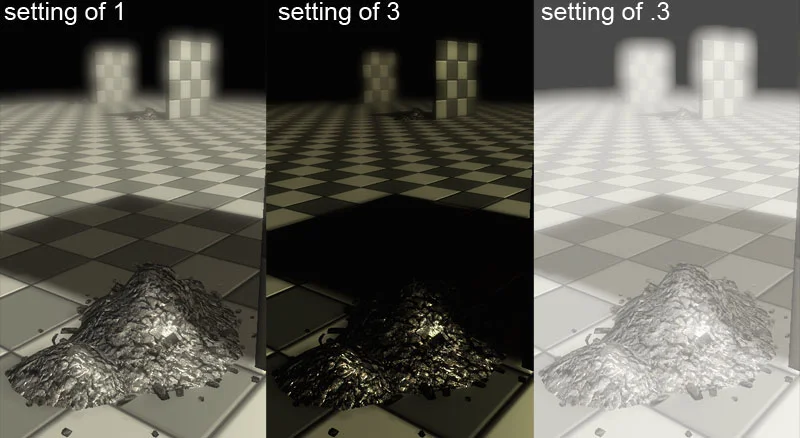
An easy way to see how this works is to crank the settings.
1. First turn 'Max Near Blur Amount' to 0 so you can see things more clearly.
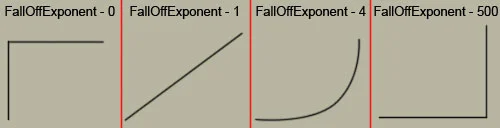
2. Lower 'Fall off exponent' to 0
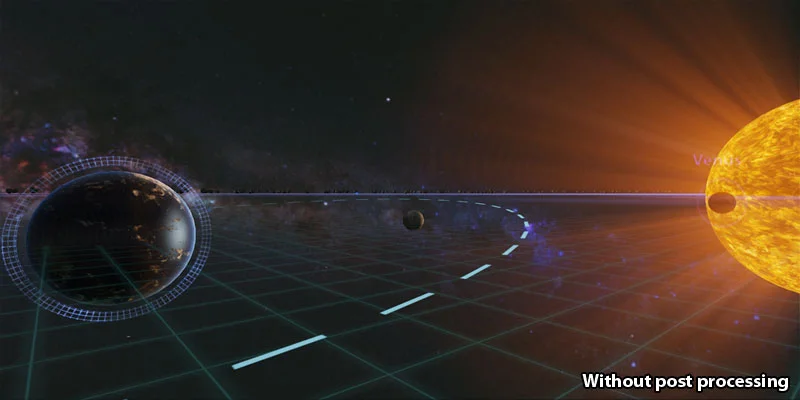
3. Crank up 'Focus Distance' do a large number, maybe around 1000.
This shows the focus distance of the scene. If you make the value greater, the line will go further away, lower brings it closer. I did this simply to illustrate what 'Focus Distance' is. That being said, most of the time you will want it set to 2, simply because in games, you won't want things close to you to be blurry, at a certain distance they become clear, then blurry again. The player should always see things clearly where they are. The 'Focus Distance' should almost always be set to 0.
Change the focus distance back to 0
'Fall Off Exponent' is a setting that gives strength to how far the fall off is.
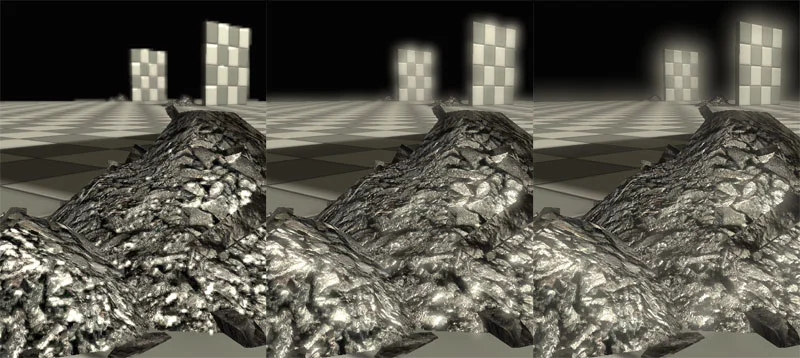
'Focus Inner Radius' is simply how large of a radius based on the origin of the 'Focus Distance' that the 'Fall off Exponent' will effect. Sounds complicating, I know, but look at the image below.
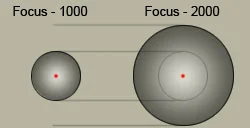
The red dot is the player with the 'Focus Distance' set to 0 so it is directly on top of the player. The gradient circle is a 'Fall off Exponent' of 1, so it's a linear gradient from clear to blurry. The outer circle is where the scene is 100% blurry. When you change the 'Focus Inner Radius' from 1000 to 2000, the radios is doubled because the number value doubled.
'Blur Kernal Size' simply scales up the fall off of the blur; this also affects the bloom value.
Size of 0 Size of 10 Size of 50
'Max Far Blur Amount' and 'Max Near Blur Amount' controls how much you want the game to blur both near and far.
Scene Lighting:
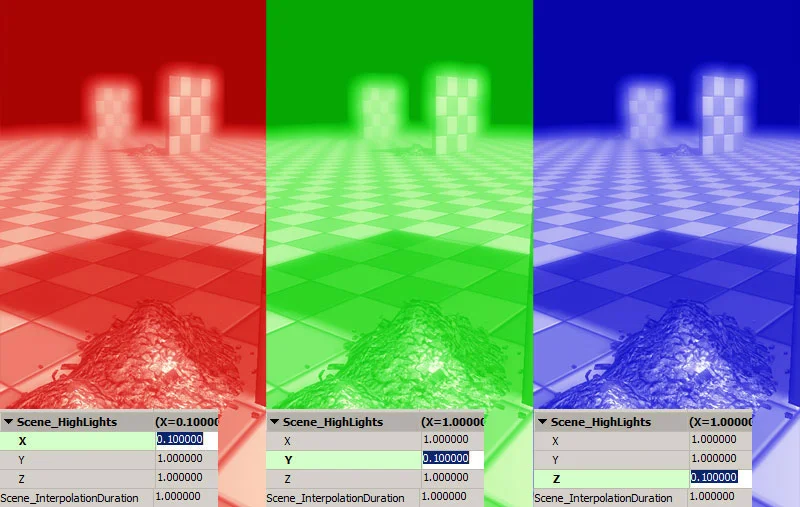
'Scene Highlights' can be very touchy. Lowering the values closer to zero will make the scene brighter, and settign them higher will darken the scene. Remember, this controls only the highest color values, so most shadows won't be affected by this much.

If you think of the XYZ number values as individual settings, you can change the overall color tone of the highlights in the scene.
Red – X
Green – Y
Blue – Z

'Scene Mid Tones' works in the same way as highlights, but it deals with the middle color range.
Red – X
Green – Y
Blue – Z
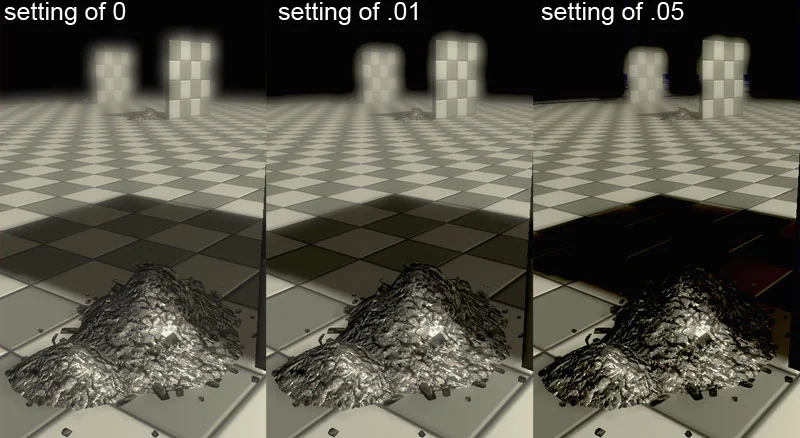
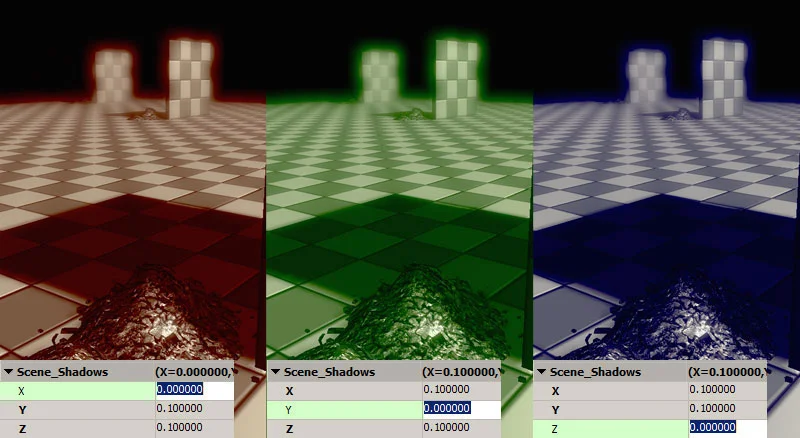
'Scene Shadows' this attribute is slightly different. Because shadows are already dark, these values start at 0, and the higher value you put for them, the darker the shadows get. Also, these settings are VERY touchy, so use extremely small values to get the settings you want.
Red – X
Green – Y
Blue – Z
I hope this little tutorial has helped you out. i thank you for your time.