UT3: Modular building and grid snapping
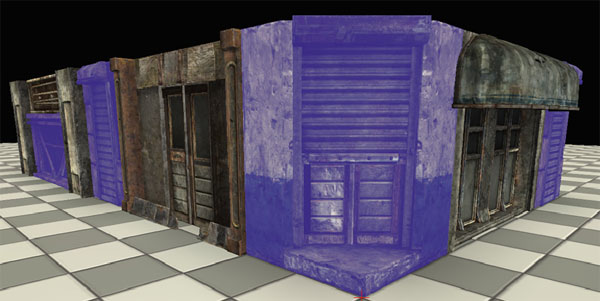
The whole idea behind modular building is to minimize the rendering and loading overhead. If you build a world out of pieces of buildings instead of complete buildings, you will be able to construct your own unique structures without having to re-load any new large assets. There are of course many other reasons why this is a good idea to build, but also ways in which you need to build them for it to work correctly.
• You can create unique buildings based on the pieces you create.
• You can have two identical structures side by side, but create one that has an area blown out of it by a mortar, adding variation to your level.
• The engine renders and loads in a certain way, so the more materials you have per asset, the more times it 'duplicates' the mesh to re-render the other materials. The more the materials you have on your mesh, the heavier your scene will become. Keeping everything in modular pieces can lower your materials down to 2 or even 1 material per asset.
• You can randomize your visual appearance easily. If you have an awning, railing, building trim, porch, stair way, door frame, etc. You can easily create multiple versions of similar buildings.
• You can add another material for the same asset, so if you have a green awning, instead of re-loading a different model with a new material, you can simply assign a new material to an existing object, again adding variation to your level.
The list goes on and on, but there are a few things you need to keep in mind while building assets in modular pieces.
Go over the '3DS Max unit setup for UT3' tutorial if you are unfamiliar with the grid and scaling based on max and UT3. This is very important for modular building.
This asset is 8 Unreal Units wide and long. This will allow for accurate snapping.
Note: the grid is set to 16 units, so in actuality, this is 8 feet wide, and 8 feet long.
By default, UT is set to the unit scale of 16.
(Each square is one foot)
Make sure in max, when you build anything, that you snap the grid to at least 1 Unreal unit (0.75) so it is possible to snap everything to the exact vert of its neighbouring mesh in the editor; however that is a very strange unit to use. It's easiest to model everything to one foot (16UU). This also applies to the height of buildings that will need to snap in the editor so you can have control over the height and floors of each building.

The asset above is also snapped exactly to the grid but is 16 units long. One thing that both these pieces have in common so far is that the pivot is exactly in the middle or at the corner for easy snapping. Inside max, the pivot point of your mesh does not matter. When you export the geometry, the 0, 0, 0 global positions (center of the grid) becomes the pivot point of your mesh.

This image shows an exported box from 3DS Max to the UT3 editor. As you can see, the pivot point was ignored and it inherited the world location of the asset.
Each asset needs to have either the center in the 0, 0, 0, or the corner. If you set it up for the pivot to be in the center, make sure you have the two ends snapping to the grid (ideally in 1 foot increments)
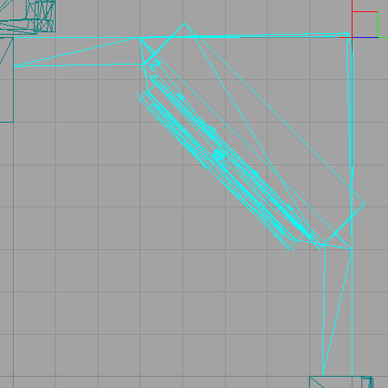
If you have a corner piece with something like a side walk, this is a method you can use to make sure everything snaps when you import it to the engine.
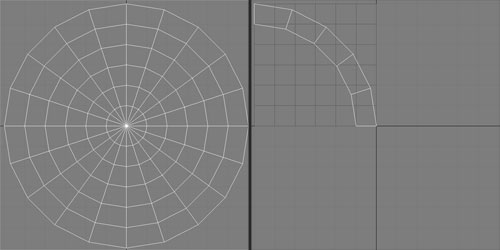
• Create a cylinder that has the same amount of 'cap segments' as the radios you want the corner piece to be.
• Create enough 'Sides' to match the grid exactly so there is an edge that matches the grid.
• Translate the piece so the corner is at the 0, 0, 0 (world zero).
This will make sure the corner piece has a pivot point to snap with, and is exactly on the corner of the mesh. This will also make sure it is exactly 90 degrees to the next corner. If you want it to be tighter, simply cut out a smaller piece that snaps to the grid.
When you bring something into the editor and you're set to say 1 Unreal Units but want to increase the unit size for snapping, you might find that your mesh does not snap any more. It will snap at 16 UU increments, but not right on the grid.

To fix this, select your mesh, right click on the grid, scroll down to 'Align' and select 'Move Actor to Grid'. Your mesh' pivot should snap to the grid and be ready for modular building.
Because of the importance of modular building, it is a very smart idea to build your map to line up with the grid as much as possible. Variance is always a good thing, but if you have something that is naturally straight for the most part like roads, it is a good idea to line each street up with the grid to make sure everything is snapped, rotated and aligned exactly how you would like. If your map is rotated slightly, it makes things much harder to place. Something as simple as inverting a light source for a street light becomes unnecessarily difficult to place.
Snapping is your friend; Use it as much as you possibly can.
I hope this little tutorial has helped you out. i thank you for your time.