UT3: Basic material editing
How to set up a basic material, plus adding details to your normal maps, and what to watch out for.
This tutorial will cover the basics of the material editor, and different ways you can change the appearance of the mesh without changing the textures themselves. This will allow for each asset to be different in some way, and yet share the same textures. For this example, there won't be much of a change, but I will be showing you some tricks about visually seeing the specs and normal maps you are working with.
Shown below, even with the correct texture settings, you may want to tweak your materials to have sharper specs, more detail in your normal map, or simply add variation in your diffuse.

For starters, you need to create your own material.
Under your 'Generic Browser Window', select the 'Generic' tab, right click anywhere on the right panel and select 'New Material'. If you are in the package and group that you want the material to be placed in, then those sections should already be filled out for you, however if you were not, you will need to fill these in yourself.
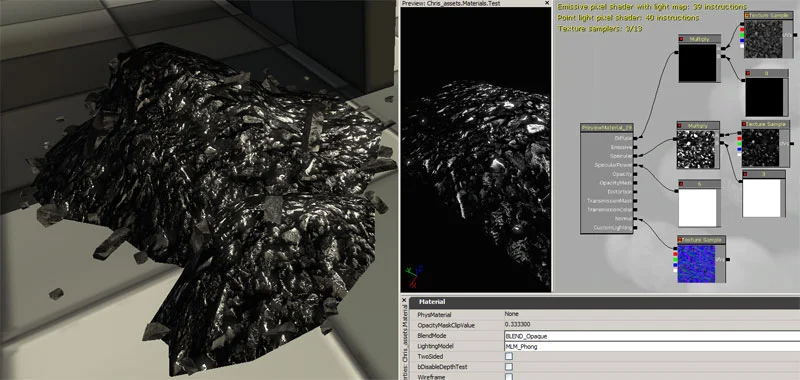
UT3 automatically opens the material you are working on. To place any texture, select it in your 'Generic Browser Window', and left flick in the material editor while holding 'T', it should place your texture there. Another way is to drag 'Texture Sample' from the right scroll down menu. If your texture is selected, it will link it automatically, if it is not selected, or you have the wrong texture, you can simply link it up by selecting your texture and clicking on the green arrow shown below.
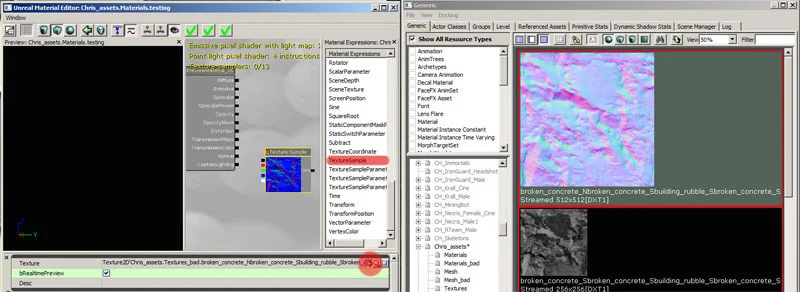
You will notice that the colors of the texture you import changes. Don't worry, it will still work the way it is supposed to.
Linking up your material to the correct channel is as simple as a click and drag. For example, with this texture, you will click on the black square (all colors) to the left of the 'Texture Sample' expression, and drag it into 'Normal'. Do this for your diffuse, spec and normal textures. This is the result I currently have.
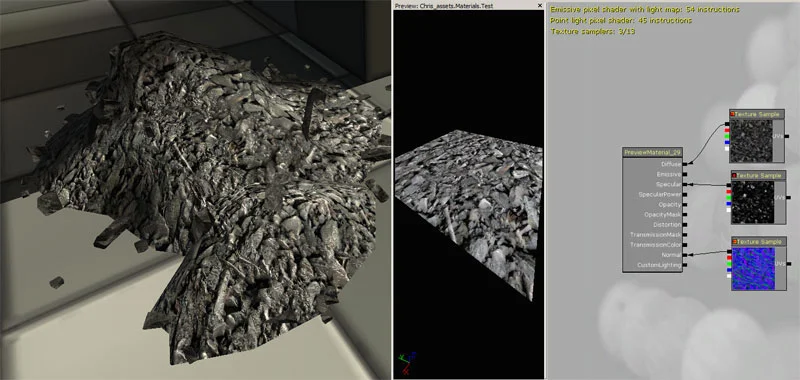
Not bad, but it can use a little more contrast. Please note that the lighting of your scene directly influences the look of these shaders. Notice how the material preview looks different from in game, this is because of the directional lights I have set up, and the slight orange tint I have on it.
Personally, I like to start with the bump and spec, however you will be going back and forth as you go through different attributes for each material.
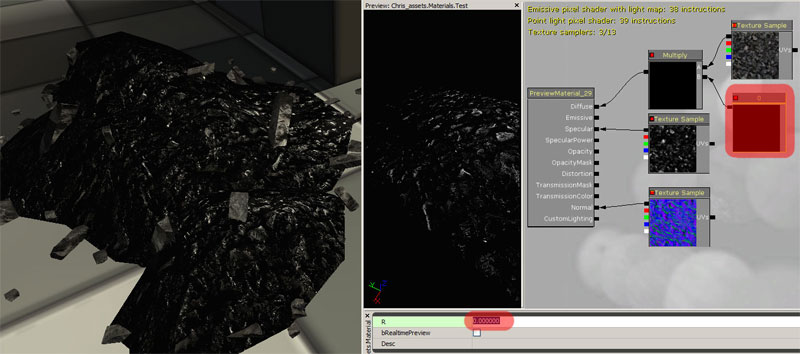
First I’ll start with the Diffuse. If you create a 'multiply' and a 'constant' variable and plug them in to each other as shown below, then you can control the darkening of the diffuse (which may help in the future if it is too bright) and you will be able to turn it right off to see the spec and normal together.
(Multiply – think of math. Anything multiplied by 0 is 0. No color = black)
(Constant – yet again, think of math. In the shader network you see below, the diffuse texture is plugged into channel 'A' on multiply, and the constant into channel 'B', and the multiply goes into the diffuse of the material. If I were to change the constant to 0, it will create black, because any color times 0 = 0 (black). If I were to change the number to 1, the color would not change, because 1 times anything is still itself. Etc.)
Now we can play around with the spec fall off and see directly how it affects the geometry itself.
I would like to play around with the spec value. Instead of changing the texture itself (because it may be used somewhere else if you're going back to tweak assets) I will set up the spec network the same as the diffuse, but instead of turning it down to 0, I will bump it up to 3. This will amplify any white value 3 times.

I like this spec value; however it falls off way too quickly. By changing the 'Spec Power' with a 'constant' variable, I am able to push it further away. This is not a 0 to 1 variable; this value can be pushed as high as you want. For this example, I am using a value of 6.
Depending on how close you get to your mesh, you may want to add some details to your normal map, OR, if you are far away, and the mesh you are working on is rather large, you can add variation to the surface by using normals.
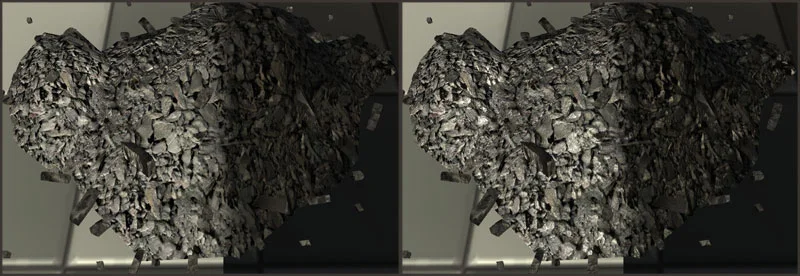
Before and after
Depending on how many times you repeat the texture, you will get a tighter bump variation.
With this, you need to be very careful with how many times you repeat the normal map variation texture. The more you repeat it, the more expensive things get. To illustrate this, UT3 has a button you can turn on to show the complexity and cost of each surface, plus how detailed a texture is. Usually you want each surface you come in contact with to be consistent. If you make a VERY detailed wall with an extremely pixolated statue beside it, the realism is taken away almost instantly.
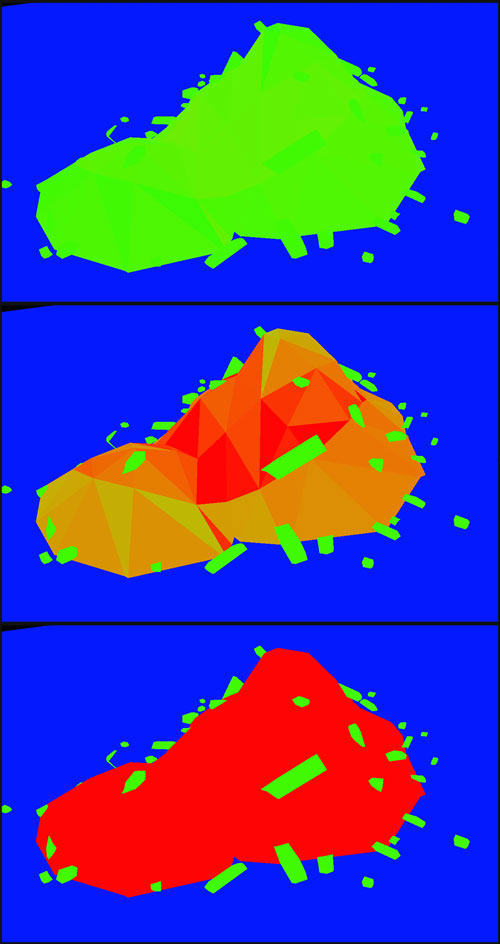
The first image here shows the 'texture density'. The button in UT3 to turn this viewing method on is located here.

The first image has a normal map overlayed 5 times evenly. This is still fairly light.
This second image has the normal map detail repeated 12 times evenly. Depending on how squashed and stretched your UV's are, you will get different coloring as you see here.
Green = good
Red = bad
In this image, the texture is repeated 25 times evenly. As you see, this is extremely heavy, and at this point, you lose a lot of detail.
The network for the normal map detail is set up like this.
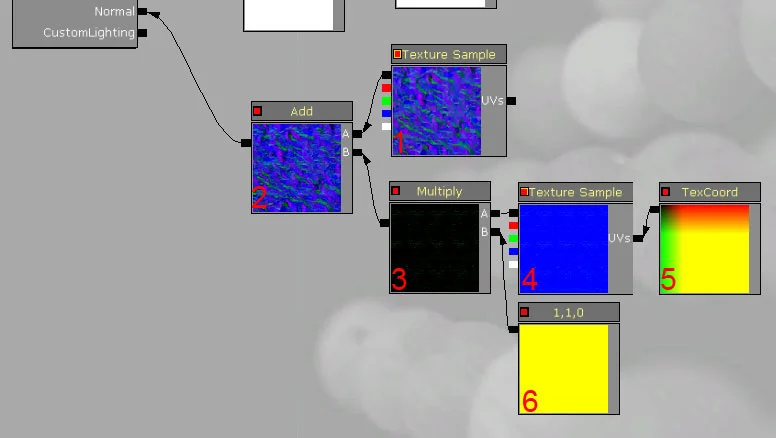
1. This is your regular normal map texture.
2. If you think about how this will work, you want to 'Add' one normal map to another; conveniently UT3 does have an 'Add' button in the list to your right. This will be adding the red and green colors (which for a normal map is where the depth lies) of your detail normal map into your main original normal map texture.
3. Multiply works the same as covered above.
4. This is your detailed normal map texture.
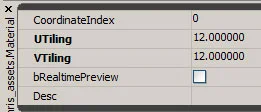
5. The 'Tex Coard' is what's used to repeat textures on your mesh. When you click on this, there is an area below where you can add how much you want a texture to repeat.
6. This is a 'Constant 3 Vector'. This expression has 3 number slots, and depending on how they are used in your shader network, they stand for different things, the most common is RGB.
When you look at a normal map, the red and green colors add depth to the surface. These colors will add fake surface distortion to your models surface where the light can pick up and specular color can be gathered. For this to work correctly, we need to turn off the blue color, because for a normal map, that stands for no surface change. With pumping this variable into your multiply expression with the third number set to 0, and the others to 1, you are adding height variance to an already bumpy surface.
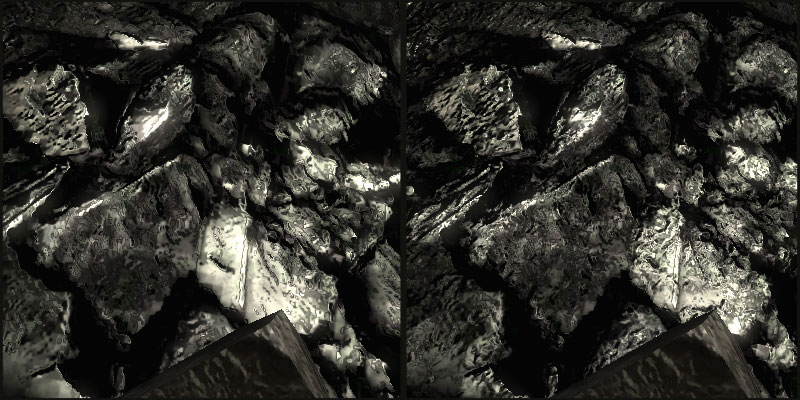
And finally, when you get the desired variations and specular highlights you desire, start playing around with the color value. With the expressions available to you, you can change colors, darken the texture, desaturate the image and much more for any material. With this asset of mine, since many of the rocks are near white already, and later on due to post processing issues, I am going to darken the diffuse slightly to remove any strange issues that may come up.
The result, before and after. At first glance, there's not much of a change, but when you look closer, especially in the shadows, it becomes more obvious.

I hope this little tutorial has helped you out. i thank you for your time.