UT3: How to use your UV's wisely
This is a very straight forward concept. This deals directly with how certain materials are laid out (if they have repeating textures, or if they are unique to a certain asset) and the UV's of an asset you will be placing in the level.
If you take very basic shapes, you can give them whatever repeating textures you want and make them work.
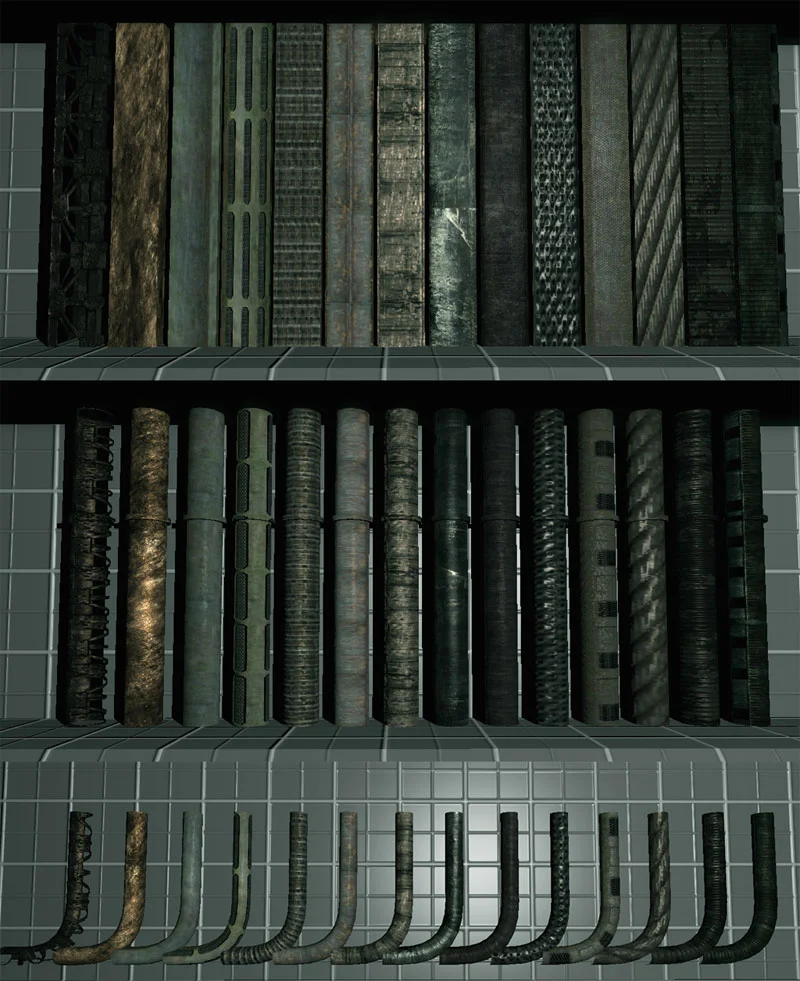
Square, Cylindrical, Bent pipes. Therese are just a few VERY basic shapes common in games. Notice that the materials for each repeat in the same direction. Some of them are slightly distorted in a certain exis or do not repeat quite the same, but the basic idea is there. If you create assets with the UV's uniform based on the size of the asset and have the uv's facing all in the same direction, it is very easy to interchange the materials.
With unreal tournament, you can have multiple materials per asset. To create this, you must use the 'Multi/Sub-Object' material.
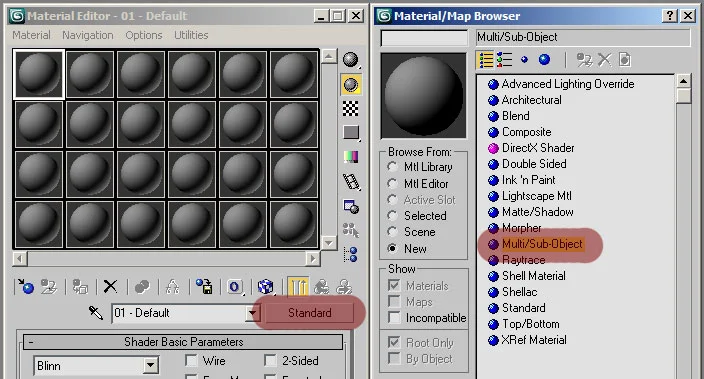
First you need to open up your material editor and select 'standard' this will open up an option list of all the available shaders. If you have 'Mental Ray' rendering enabled, these options will show up differently. If the multi sub is not in the list, go into your rendering option and change which rendering software you are using.
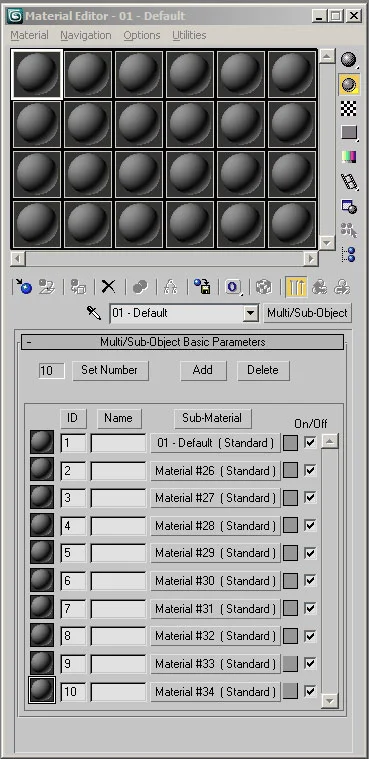
Once you change your material to 'multi sub', it will ask you if you want to save your previous material. If you choose to keep it, that material will show up as #1. Each numbered material by default is a 'standard' material, so everything should be fairly familure to work with.
When you press the 'Add' or 'Delete' options, it will add or subtract a material at the end. So if you hit 'Delete', it will remove the 10th material if you only have 10 in the multi sub.
In order for Unreal Tournament to recognise multiple materials, you must assign them to your object through this function. Any materials you are not using, make sure you remove them to keep the assets clean for any other artists using your asset files.
When you are ready to export your assets, there are no options you need to turn off or on. The channels will show up in unreal. This has been covered in a previous tutorial so i will not go too much into how everything works with that. If you're familure with unreal, you should know this funtionality.
That being said. If you have an asset that is using multiple materials, it is possible to change one of those textures, adding variation to assets that would other wise be repeated.
This image illustrates this rather well.
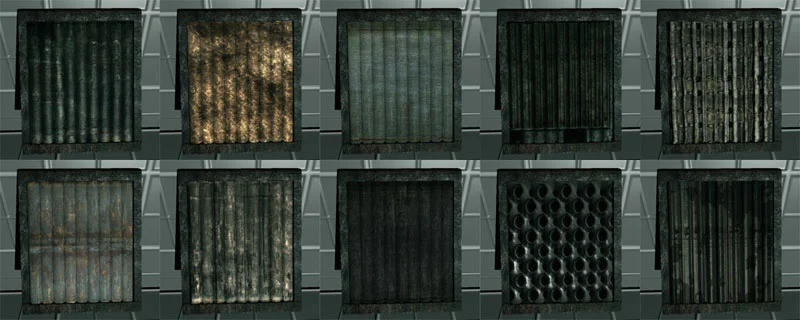
Here we can see 10 images of the same asset with one material that is changed. This can allow you to use the same asset over and over, but change the materials assigned to it to give variation and 'unique' details.

If you select the object and open up its properties, go into the 'static mesh actor, static mesh component, rendering, materials'. Nothing will show up here until you press the + button. If it is the second material you want to change, click the + button again to add a second material and place your material in there by selecting it in the “general browser” and clicking on the green arrow in the mesh' option window. This will then replace the default material with your desired one.
Remember that the more geometry you have with unique materials, the engine has to calculate that a little bit more, so it will effect the engines performance, but only slightly.
I hope this has helped.
I hope this helped you guys out.