UDK – Unreal Development Kit
Mesh Position Offset the Materials Texture
Object World Position: This function can be used to translate your textures based on their worlds position.
This web site covers the new features in UDK, and i strongly reccoment you to brows through it quickly.
http://udn.epicgames.com/Three/DevelopmentKitBuildUpgradeNotes.html
UDK: How to offset a secondary 'detail' texture when the asset moves around your scene.
If you have ever created a game before, you are failure with the terrible repetition of assets around a scene. Either you need to create a new mesh, new material or place a decal or object over a section to hide the repeating texture when you duplicate the asset around your scene, but no longer is that the case.
This method works best when you break up your repeated assets with some sort of object such as a pillar, beam or other method. If you have a long wall, BSP's are the best way to go, but if you have a wall that you want to place with 'supports' between them, and you have 2 models to work with, this is the problem you run in to.
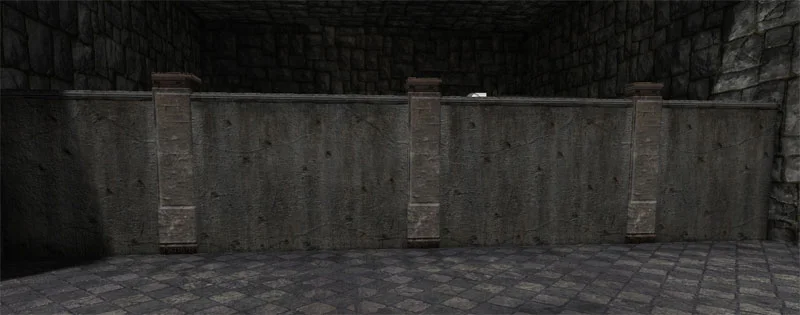
This is alright, and with decals you can hide the repeating details, but we can break this up. I will focus just on the walls, not the 'supports' in-between them.
If you look at the material for this shader, it is very basic.
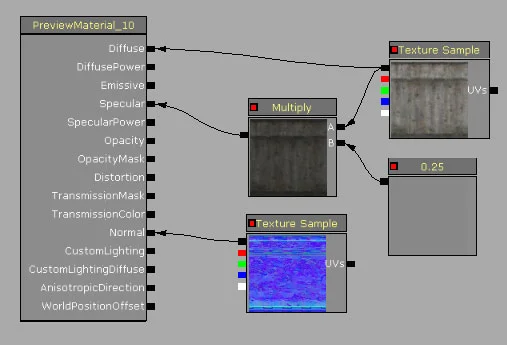
A diffuse, dull diffuse for spec and normal map.
If we wanted to add another texture to this shader to add more detail, we get a more interesting wall, but still the same problem.

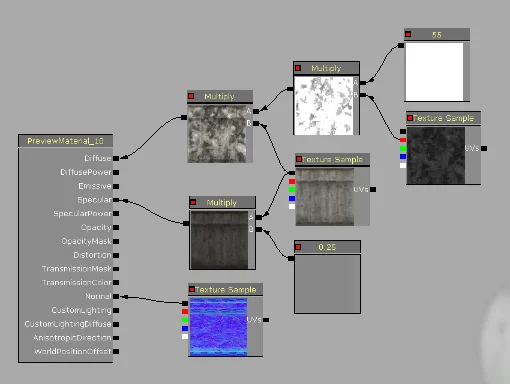
A simple texture with the red multiplied by a large amount which is in tern multiplied by the original texture. The result looks nice, but now the repeating base texture is more noticeable, so this just won’t do.
This next step will change based on the scene, the UV method and the geometry used, but it will help break up that repeating pattern so apparent in so many of today’s games.
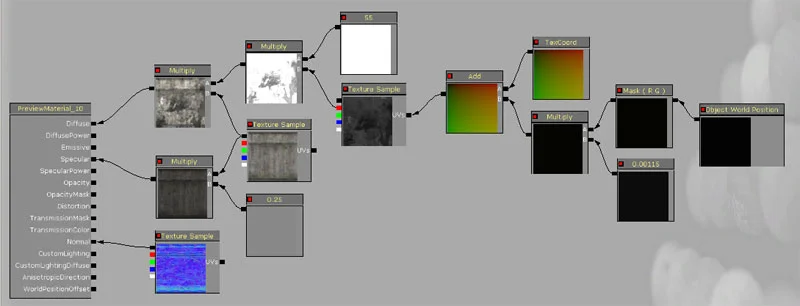
If you create an 'Object World Position' node, mask that by red and green (Component mask), multiply that by a very small number (This is where things will change based on your models), in this case it was 0.00115 and 'add' that to the texture coordinates, this is the result you get.
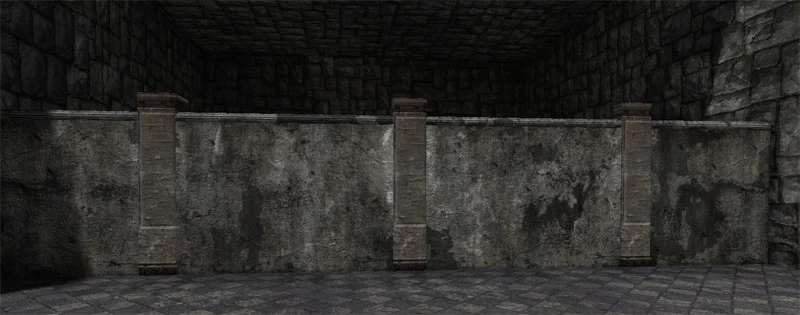
As you can see, the overlaid pattern is offset for each peace, this is based on the relative position of the wall itself. The base diffuse and normal maps stay the same so you have to make sure there's no noticeable area there to pick up the 'repeating pattern' from.
It is best to make the secondary diffuse texture repeat less than once per object to give for more variation when you offset the textures. In this example, the “TexCoord' is set to 0.3, 0.3 so for every 3 walls, the pattern will repeat. This can be set to anything you wish, but when the texture is repeated more or less, the “Object World Position” multiplied value needs to be tweaked to fit it. If you repeat the texture less (U and V values are decreased) the 'OWP' number also needs to be decreased by roughly the same ratio.
You will notice a small issue with this. When you place a new asset in the scene and move it around, through the blue highlight color, you'll see the secondary texture staying behind (provided you have it set up as accurately as i do), however when you rotate the mesh, this secondary texture will move in a slanted direction. For a grime texture, this is perfectly fine, but if you want to keep 'lines' of variation visible, creating a mask for the second layer would be your best choice.
Here you can see the object and the base diffuse and normal map moving, but the overlaid texture stays stationary.
Have fun.
I hope this little tutorial has helped you out. i thank you for your time.